1. Hidden Signs of Screw Wear
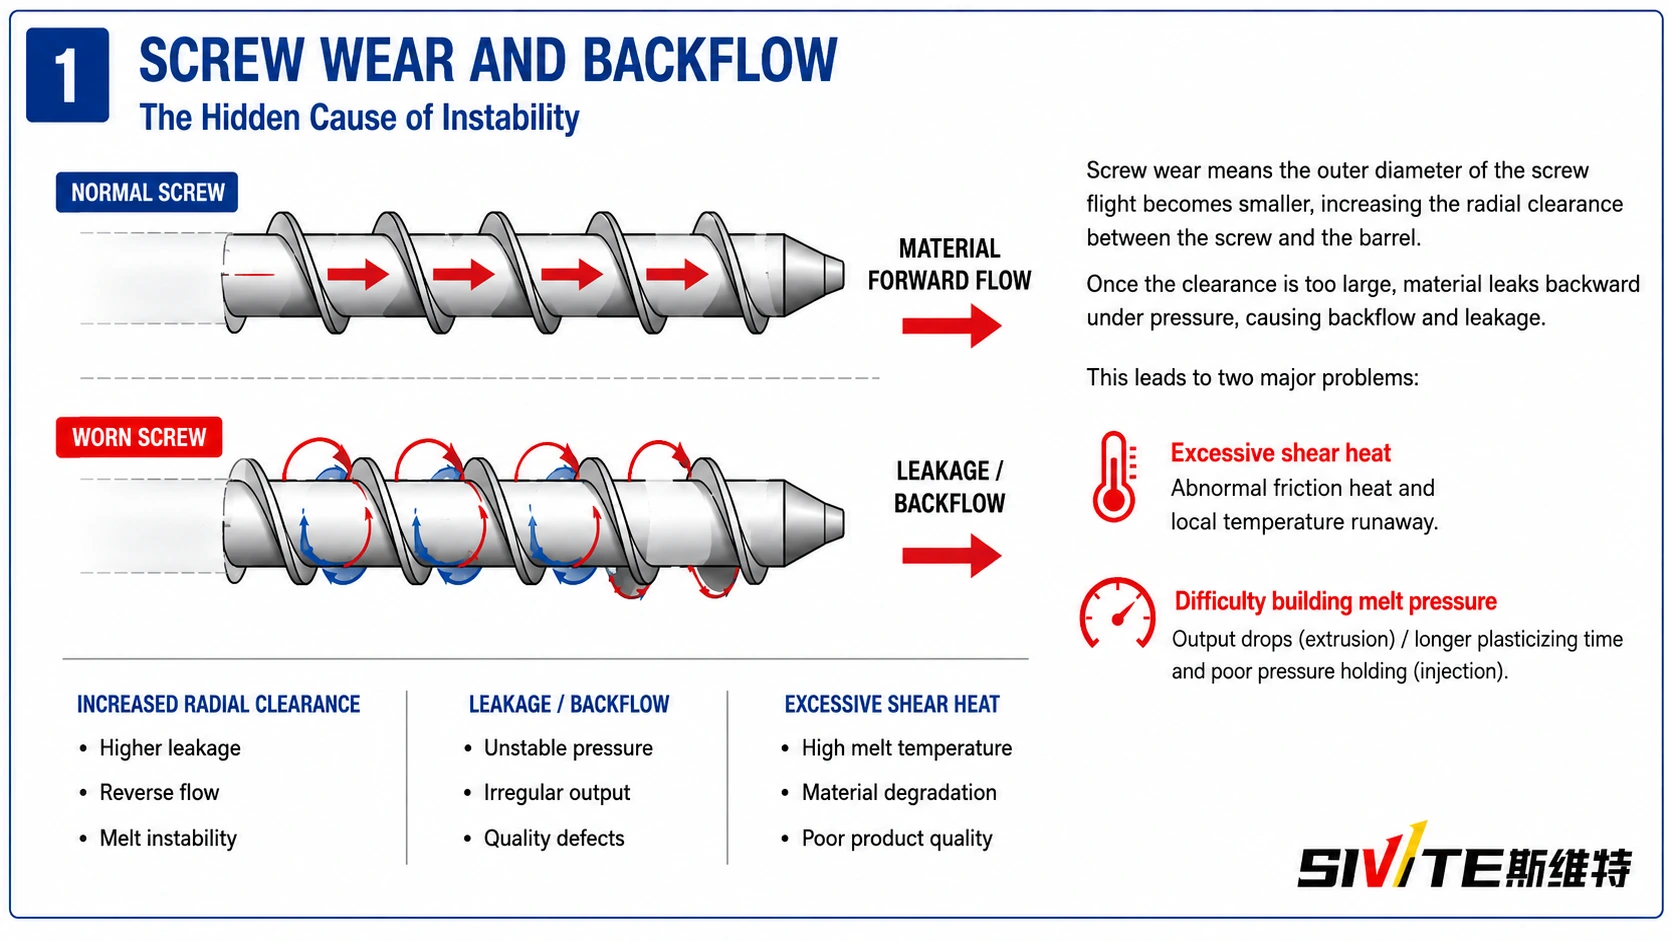
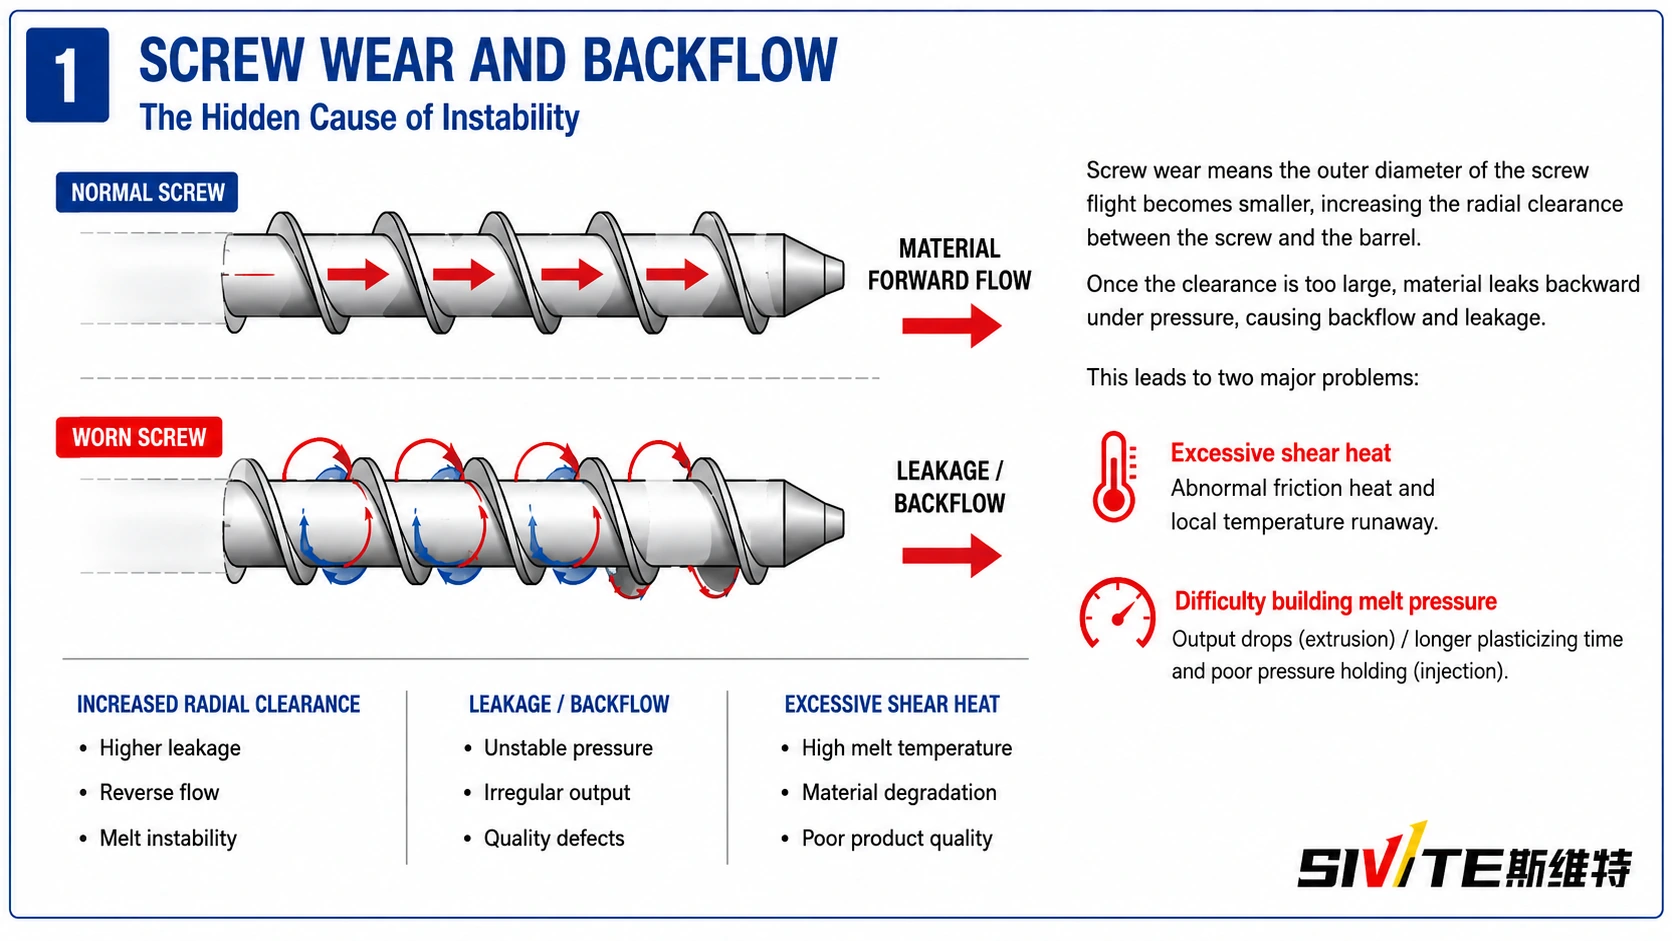
Screw wear increases the radial clearance between the screw flight and the barrel. Once the clearance becomes too large, material leaks backward under pressure, causing backflow and leakage.
Factories often notice the problem only after sharkskin, black specks, output loss, or unstable pressure appears. By then, wear may already be severe.
Abnormal friction heat and local temperature runaway increase material degradation risk.
Extrusion output drops; injection plasticizing time becomes longer and pressure holding becomes unstable.
2. Four Practical Ways to Diagnose Screw Wear Without Removing the Screw
Without removing the screw, diagnosis must rely on process data, pressure behavior, thermal response, and minimally invasive inspection. The four methods below can be applied during normal production or a short planned stop.
Method 1: Melt Pressure and Pressure/Position Data Analysis
Under the same material, process temperature, and stable operating conditions, compare current data with historical values from a new screw or a known good screw.
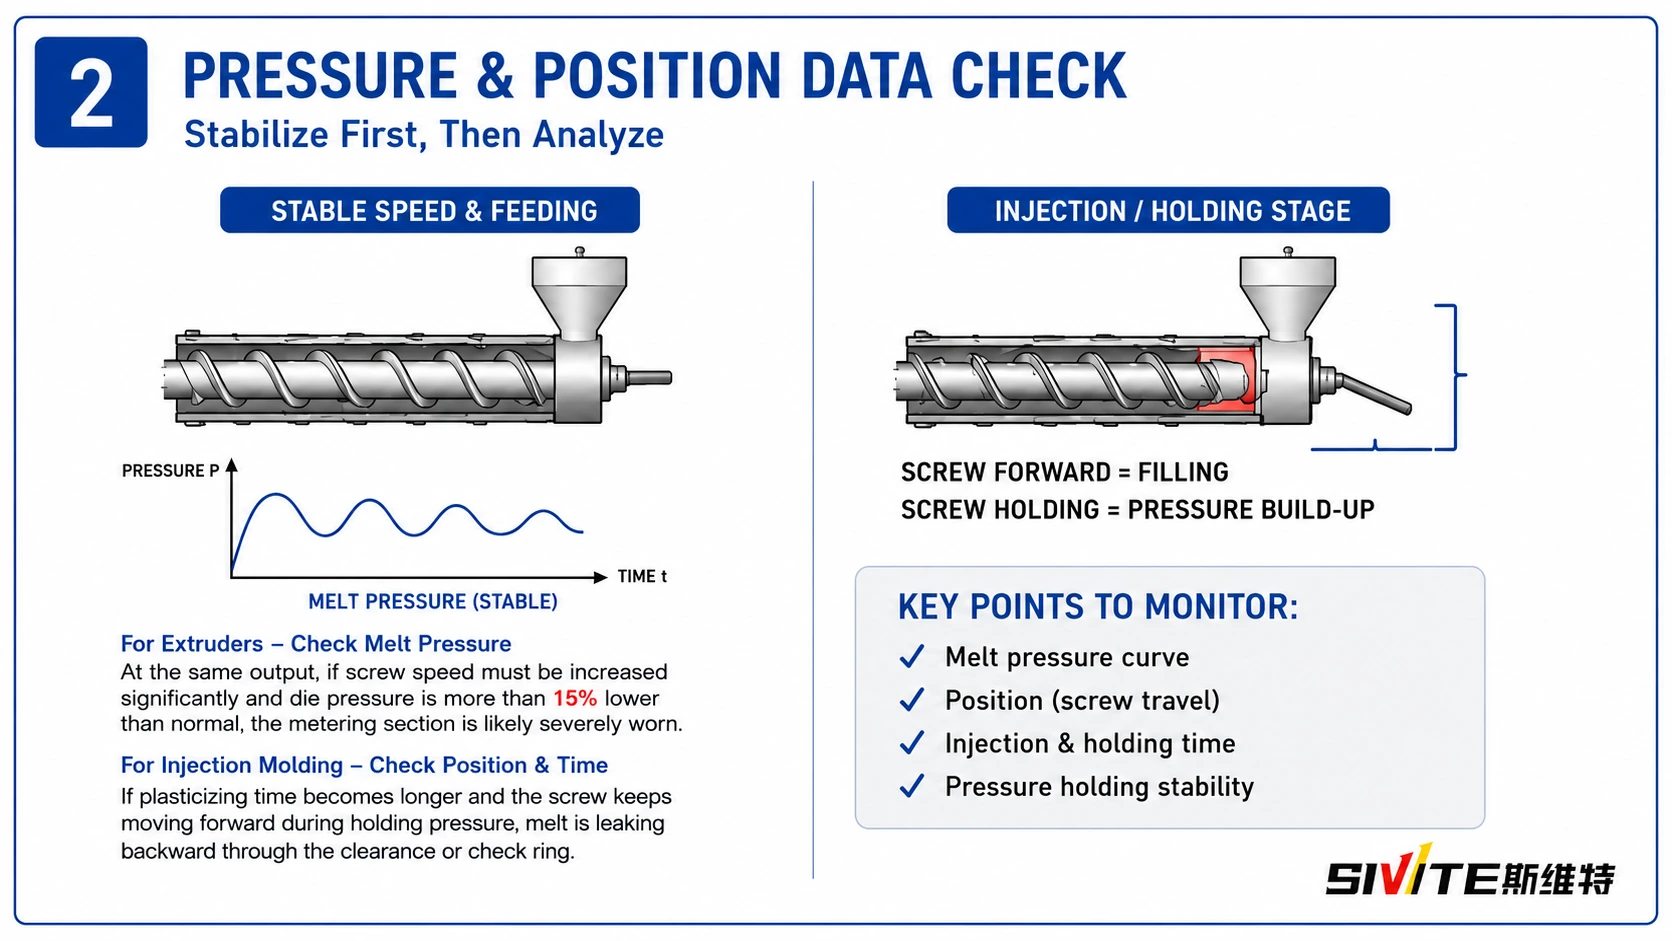
For Extruders: Check Melt Pressure
Keep feed rate and screw speed constant. Severe wear is likely when:
- You must significantly increase screw speed to maintain the same output
- Die-head pressure is more than 15% lower than normal
- Pressure fluctuation becomes irregular and much larger than before
For Injection Molding Machines: Check Position and Time
Longer plasticizing time or slow forward screw movement during holding pressure indicates melt leakage through:
- Enlarged screw clearance
- Worn check ring / non-return valve
Method 2: 5-Minute Shutdown Pressure-Drop / Backflow Test
This practical test can be performed during a material change or short production stop.
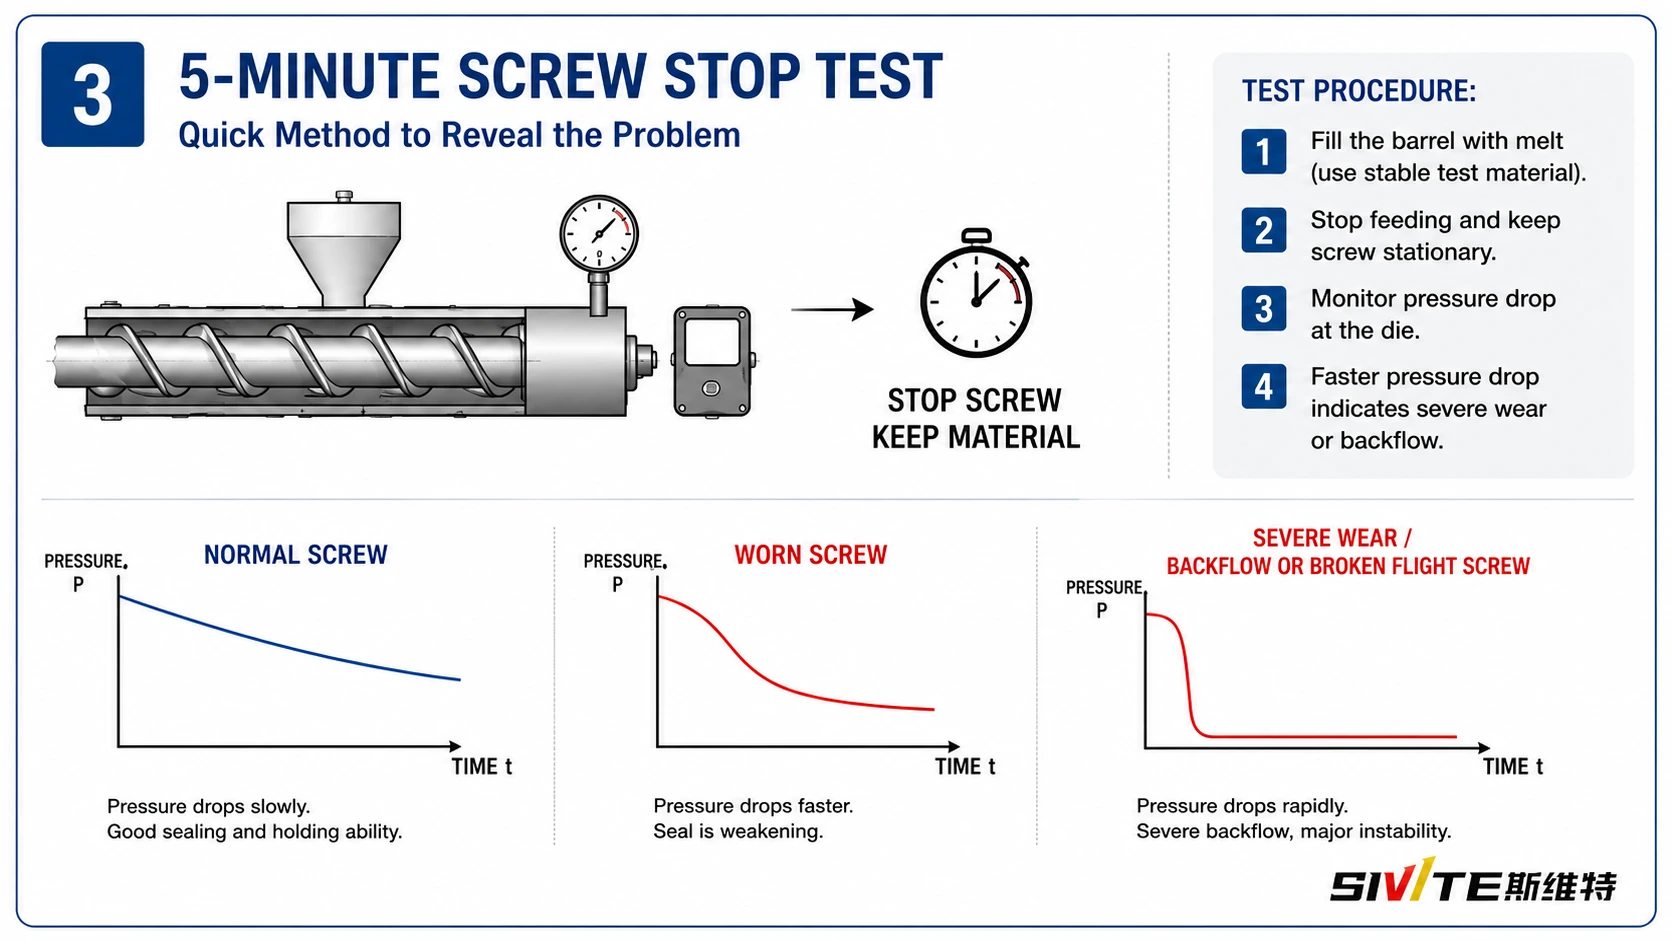
Basic Procedure
- Fill the barrel with melt
- Preferably use a stable standard test material, such as a high-MFI polyolefin or a dedicated purging compound
- Stop feeding and keep the screw stationary
- Use the pressure sensor near the die head to monitor pressure decay
- On injection molding machines, a small manual forward movement can also be used to create initial pressure
How to Judge the Result
Normal clearance produces a slow pressure decrease. A sharp pressure drop indicates rapid backflow through enlarged clearance or a worn sealing element.
Method 3: Reverse Diagnosis from Process Data
Sometimes the machine is already warning you, if you know where to look.
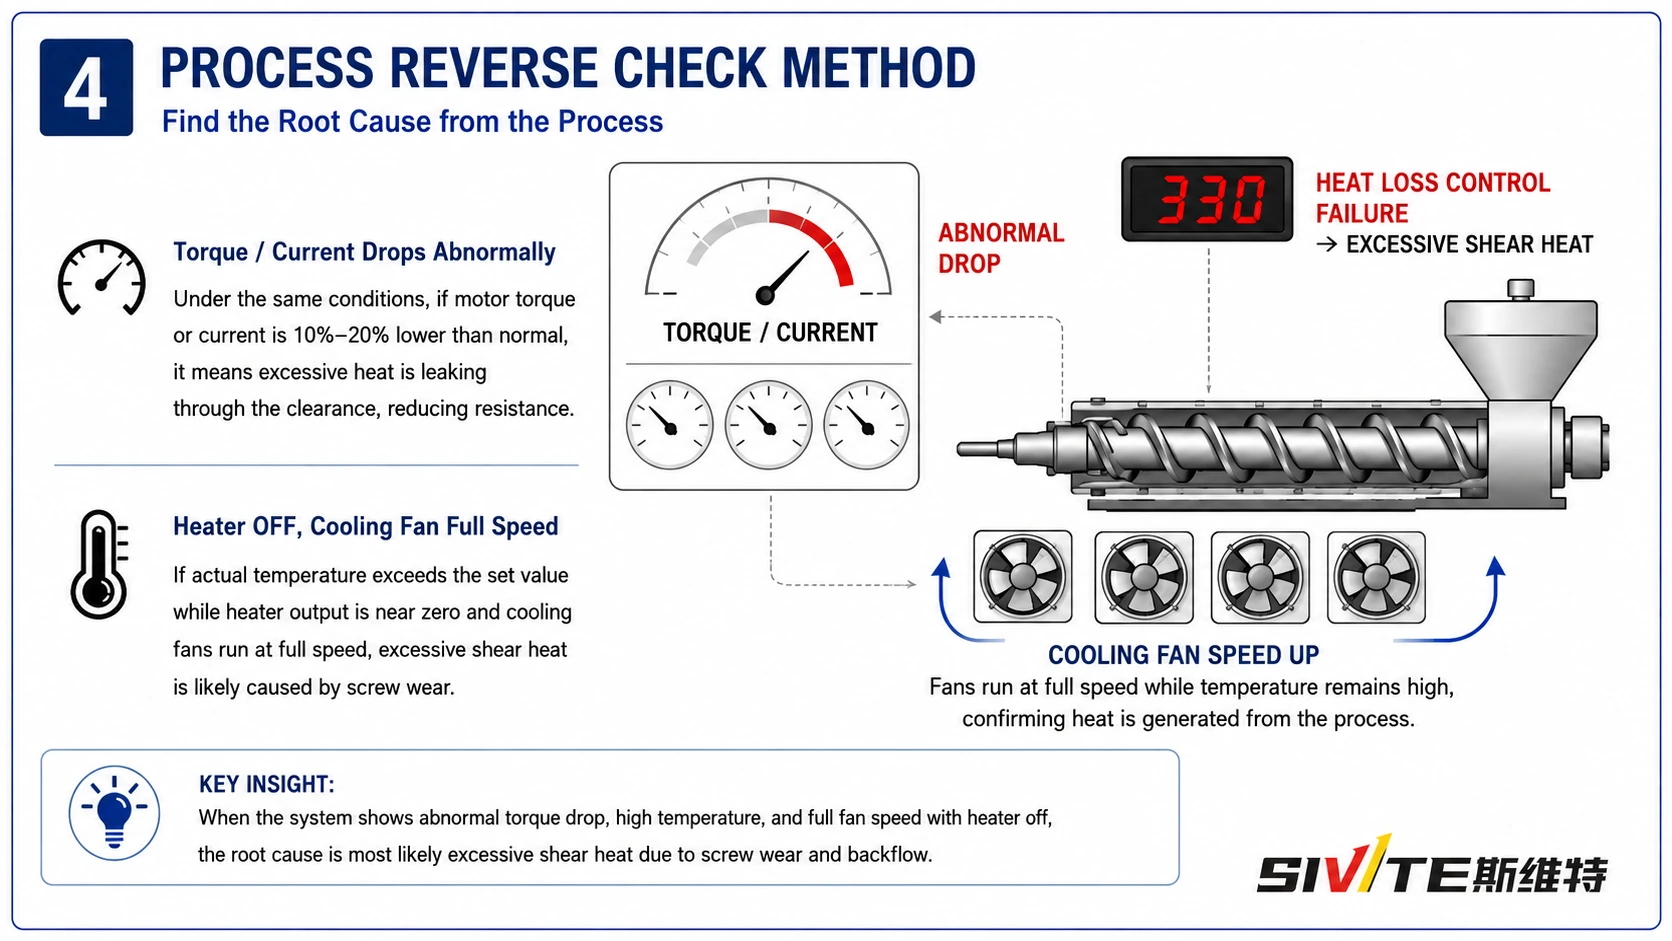
Abnormal Drop in Torque or Motor Current
Under the same material, temperature, and screw speed, if motor torque or current drops by around 10%–20% compared with historical normal values, do not assume the machine has become more efficient.
In many cases, it means the clearance has increased and part of the material is leaking through, reducing viscous resistance on the screw.
Heater Off, Cooling Fan Running at Full Speed
Severe screw wear can create abnormal shear heat. Typical signs include:
- The set temperature is 200°C
- Actual temperature keeps rising to 215°C or higher
- Heater output remains at or near zero
- Cooling fans or cooling water stay fully active for long periods
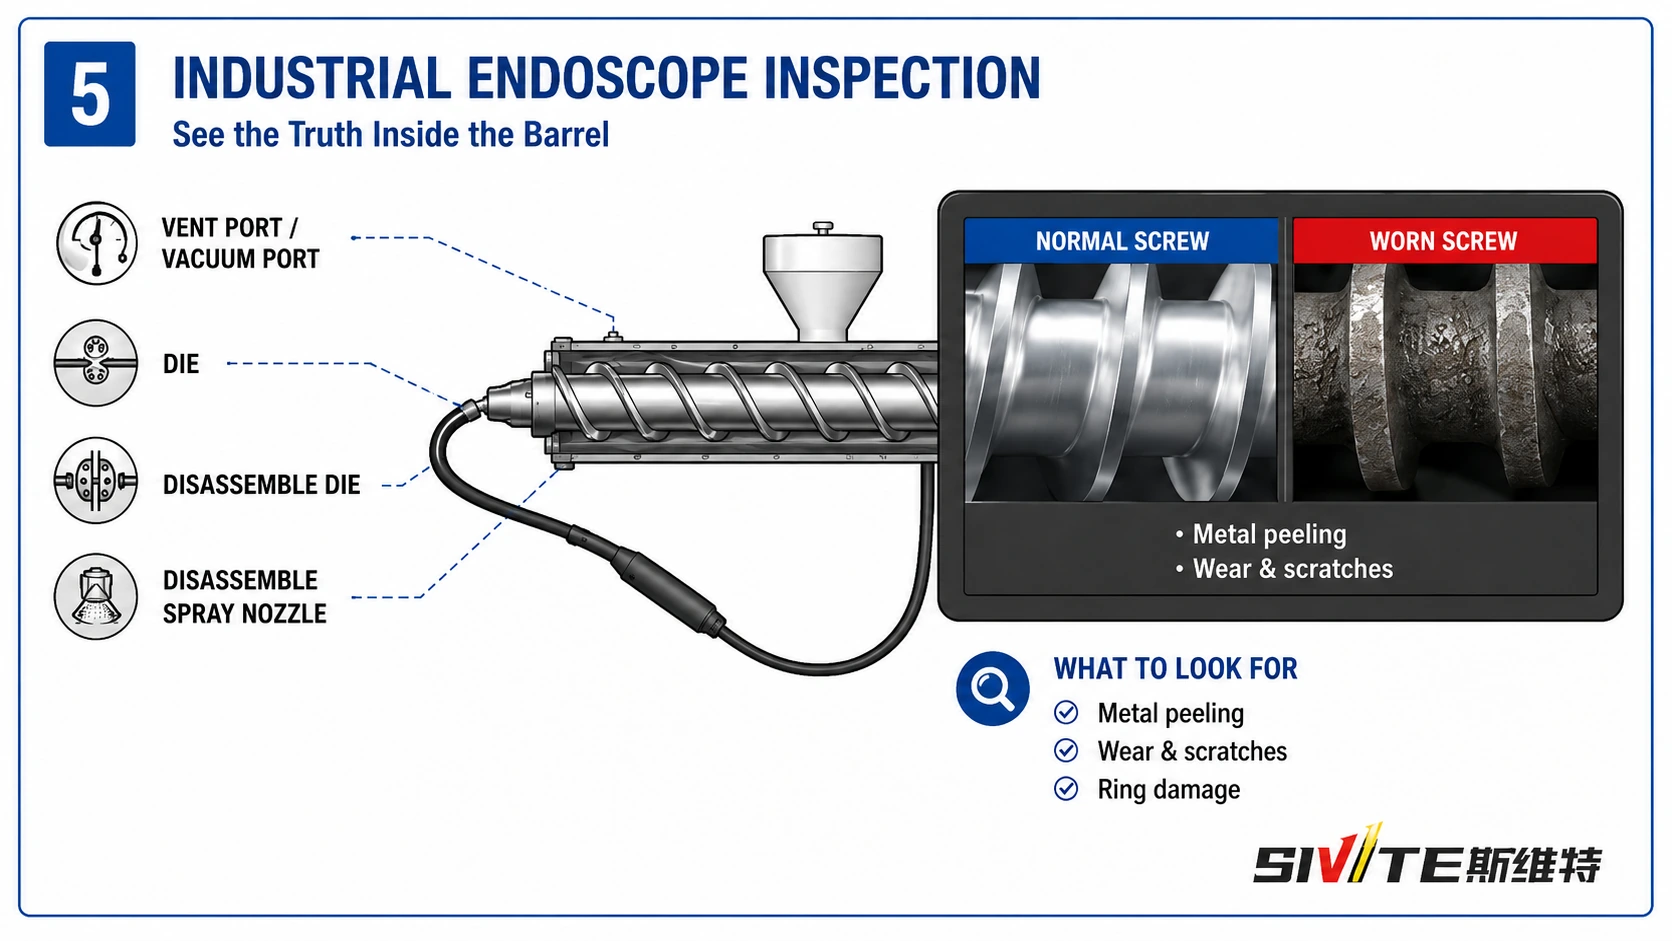
Method 4: Advanced Inspection with an Industrial Endoscope
If the first three methods strongly suggest wear, but you still want more direct confirmation without pulling the entire screw, this is the best advanced option.
Use a high-temperature industrial endoscope to inspect the screw flight and barrel area through an existing opening whenever the machine structure allows it.
For Extruders
Use the vent port, vacuum port, or die-head opening after removing the die.
For Injection Molding Machines
The nozzle can be removed while the machine is still warm, allowing the endoscope to inspect the front section.
What to Look For
- Rounded or flattened flight tops
- Visible metal peeling
- Scratches
- Wear marks
- Damage to the check ring area in injection machines
3. Quick Diagnostic Logic for Daily Production
When production output drops or process stability gets worse, use this sequence to narrow down the cause. Also review Plastic Sheet Extrusion Line configuration, screw design, material properties, and downstream forming requirements.
Output Drops / Plasticizing Time Becomes Longer
This usually indicates wear in the feed section or metering section. For extrusion, compare the historical screw speed vs. output curve. For injection molding, check for backflow during holding pressure and screw creep.
Actual Temperature Exceeds the Set Value
This often indicates severe wear in the corresponding section, where enlarged clearance causes excessive shear heating while heater output remains near zero.
Die-Head Pressure Fluctuates / Holding Position Becomes Unstable
This is a typical sign that the metering section, homogenizing section, or non-return ring can no longer hold pressure effectively.
Conclusion: Data Often Tells the Truth Earlier Than Your Eyes
When output drops and temperature starts drifting, do not immediately organize a large maintenance team to pull out the screw.
Instead:
- Pull out production records
- Compare current data with data from three months ago
- Review torque, pressure, temperature, plasticizing time, and heater output
- Use the four methods above to make a structured diagnosis
In many cases, data reveals the truth earlier than visual inspection. Accurate diagnosis before disassembly saves production time, labor cost, maintenance cost, and material waste.
And most importantly, it helps you make the right decision with confidence. You can also learn more about SIVITE engineering support on the About Us page.
Need Help Diagnosing Screw Wear or Extrusion Instability?
SIVITE provides professional extrusion troubleshooting, screw design support, and customized plastic sheet extrusion solutions.
Related Equipment
Sheet Extrusion Lines
For PET, PP and PS sheet production, review the extrusion configurations and engineering options relevant to this technical topic.
View Sheet Extrusion LinesDiscuss your application on WhatsApp